

A Guide to Videography for Photographers - 16 Videographer Tips
You've mastered photography, and now you've been asked to create a video for a client too. That’s easy, right? You start daydreaming about how cinematic your first project will look, and that dream quickly derails when you realize that photography and videography are not the same. Your footage is choppy, shaky, flat, and you can't seem to save your highlights or shadows as you do with a photo. You go from feeling like a pro to feeling like an amateur with a thrift shop camera kit.
If you're in this position, you're not alone. Professional photographers looking to expand their services have run into the same issue, and some have shared their experiences with us:
"Adding videography services to my existing photography business was a great asset and challenge! I'd say my biggest areas of struggle came from the technical side - specifically, shutter speeds, as well as transitioning to more movement-based posing. Shutter speeds in videography vary because they are largely dependent upon your frames per second versus a setting used for different movements or to adjust for lighting in still photography. While prompt-based poses have always been a crucial part of connecting with my clients to create authentic images, introducing videography into this equation made me aware of how those movements are portrayed in film. I've moved from still poses to much more fluid and movement-based prompts in both my video and photo workflow." Molly Margaret Photography
"Due to Covid in 2020, we decided to add films to our wedding services to make extra income. We thought it would be an easy endeavor. It turns out it's extremely hard! Videos that looked great on a 2-inch screen were so shaky once viewed on a computer, and we were using zoom lenses, which made it worse, fluorescent lighting creates banding, and manual focus is tough to nail. Then you have the sound quality to think about, sorting through royalty-free music sites, and somehow stitching all of that together in a visually appealing way. Also, video editing is so much more time-consuming than photo editing, especially if you are still learning to use the software.
We took on four weddings videos this year, and we learned so much; which equipment worked for us, and which didn't, and how much different creating a still image is from creating a compelling movement-based story or emotion." Rachel from the Turquoise Camera
"I thought the video would be easy after several years of photography, but I was wrong. While I fumbled with remembering shutter speeds and frame rates initially, the biggest challenge I had to overcome was mastering audio. It took me longer than I want to admit to figure out how to record quality audio. Even if the video footage is great, audio has the power to make or break your video." Cassandra Vagher Creative
We've created this guide for photographer learning video, so you can minimize the "amateur" phase and jump right into creating quality films that land you paying gigs. Here are our top 16 videographer tips to shorten your learning curve.
Table of Contents
A Guide to Videography for Photographers - 16 Videographer Tips
The Relationship Between Shutter Speed and Frames Per Second
Pay Attention to White Balance
Start Shooting in Log Profiles
Get Your Hands On The Best Cameras
Learn the Lingo: A-Roll vs. B-Roll

-
Master Audio
This is the absolute #1 thing that you have to get right. A saying in the industry is that audio is 80% of video. Get it wrong and it doesn’t matter how good your visuals are...no one is going to stick around to watch it.
Your camera records audio, so you’re all set, right? Definitely not. You never want to use “on-board” audio! Only use that audio as an emergency backup method and not your primary solution. As a rule, try to capture audio with multiple devices; in case one fails, you have a backup plan.
Tips for capturing clean audio:
-
Make sure your mic is close to your subject. The further away it is, the more diminished the quality. This is rule #1. Do everything you can to get the mic close to your talent.
-
If you're recording in an office space or room, make sure to have enough soft surfaces. Audio will have an echo or reverb of walls and windows. You can eliminate this with carpeted areas or by putting up sound blankets. Place two sound blankets close to your subject (but out of frame). These are easily hung from backdrop stands.
-
Always capture audio from at least two sources.
-
Do not use your built-in camera audio recording.
-
Always adjust your gain to keep the output level between -18dB and -6dB. If your recording levels are getting close to 0, your audio may clip!
-
Try to avoid putting lav mics in places they will brush against fabric or hair.
Here are a few audio recording hardware solutions:
Lav Mic
The simplest solution for recording audio is micing up your subject(s) with a lav (also known as a “lapel” or “lavalier” mic). This way, the microphone is close to the audio source and barely noticeable. It's also easier than lugging around a mic on a boom. If you're filming a wedding, we suggest putting a lav mic on the bride, groom, and officiant, if possible. That way you get a quality signal from each of the three most important sources.
Try out these lav Mics:
Sennheiser G3 Wireless Lav Kit (single)
Comica Dual Wireless Lav Mic Kit
On-Camera Shotgun Mic
Shotgun mics are generally directional mics that you can use on top of your camera to capture audio and wire it straight into your footage. These mics are best when placed close to your subject. The further out you get, the more the quality of your audio diminishes (which is true for any mic). Use this mic as a backup option and to help you sync your lav mic audio with your footage in post.
Take a look at these Shotgun mics
Rode Videomic Pro Plus Shotgun Mic
Sennheiser MKE-600 Shotgun Mic
USB Mic
If you're recording a voice over the Shure MV7 is an excellent solution to recording audio straight into your computer. This podcast mic has crystal clear output, with very little background noise. Be sure you’re in a quiet environment! (see audio tip #2 above)
Audio Recorder
When you’re using more than one microphone, you’ll need to record that audio into a recorder of some sort, since most cameras only have a single 3.5mm audio input.
Some possibilities:
Zoom H5 Audio Recorder (2 inputs, expandable to 4)
Zoom H6 Audio Recorder (4 inputs, expandable to 6)
-
Learn Frames Per Second
Frames per second are just like it sounds - that the number of images that make up one second of video. This isn't a one-size-fits-all scenario, so you’ll need to think about the level of action you’re capturing along with the end result you’re looking for. Also keep in mind that some cameras do not have all of these frame rates available, especially at higher resolutions.
30 Frames Per Second
What you usually watch the news in and other broadcast TV is generally 30 frames per second.
23.976 Frames Per Second
Think of your favorite cinematic film; chances are most of it is filmed in 23.976 frames per second (which you should use too). This frame rate is the golden standard in the film industry.
60 Frames Per Second
You've seen Lord of the Rings, right? The hyperrealism in the movements is due to the 60 frames per second. While it loses its cinematic feel, some projects are appropriate for 60 frames per second played back in real-time.
Want to turn your footage into slow motion? Then you'll want to shoot in 60 frames per second or higher! Most wedding filmmakers shoot all of their B-Roll in this frame rate so they can turn it into slow motion in post.
120 Frames Per Second
If your camera is designed for video, it may support 120 fps (or even higher), which is slow motion. This frame rate is overkill for some things, but for things like water dropping and higher speed sports, it can look very cinematic.

-
The Relationship Between Shutter Speed and Frames Per Second
When you're taking photos, you're probably adjusting your shutter speed gradually as lighting situations change, as well as your ISO. When you're filming, you have to rethink how you operate your camera settings. If you crank your shutter speed too high, you'll affect your video's overall look, causing choppiness and altering motion blur.Without getting too technical, this is because your shutter speed directly correlates with the frames per second you're shooting in.
Here's a cheat sheet to help you figure out what shutter speed you want to aim for so your footage will look its best:
23.976 FPS - 1/50
24 FPS - 1/50
30 FPS - 1/60
60 FPS - 1/125
120 FPS - 1/250
A rule of thumb is to double your shutter speed. Make note that most cameras don't have precisely the doubled amount - so round up!
-
Add Motion To Your Videos
Remember, this is a MOVING picture, so let's add in motion. There are two variables here, your subject moving and your camera moves, which make your films much more exciting and cinematic. When photographers switch to video, most are used to their clients being mainly stagnant to get the shot - well, you don't want that in a video! Instead, focus on guiding your clients or subjects through scenarios with prompts, and don't forget to move yourself! Gimbals and glide cams give you the freedom to create parallax and panning type movements easily, so be sure to review the section below on how to get smooth movement in your films.

-
Camera Stabilizers
No one likes shaky video, and only using a tripod always makes the video feel stagnant. While IBIS (in-camera body stabilization) helps, it's not foolproof. Here are some options for stabilization:
Gimbals
Using a gimbal does take a little practice, but it can up your video game significantly. The Ronin S and new Ronin RS 2 are two of the best gimbals on the market. An added benefit is your right arm will be ripped after a few weddings hoisting your camera around on this!
While gimbals do make your footage look slick, not all gimbals can host much off-center weight, so you’ll want to skip the telephoto lenses. For instance, even though the new Ronin RS 2 maxes out at 10lbs total capacity, you wouldn’t be able to balance it correctly if you tried to use a huge lens on a smaller body. Using wider-angle prime lenses on a gimbal will offer the best results and help make things much easier to balance.
Glidecams take much more practice, patience, and arm strength than gimbals; however, some filmmakers prefer less mechanical looks. If you're planning on renting a Glidecam for a project, make sure to give yourself time to practice setting up and using the device. These units are not motorized like the gimbals, so you do have the flexibility to add more weight if your arm can handle it! They are also a choice if you’re on a limited budget but still need some form of stabilization.
Dolly/Slider
If you're looking for smooth tracking shots, this is what you'll want to use! If you want to run a two-camera shoot but only have one person, the programmable Kessler Second Shooter Kit is an amazing way to add dynamism to your footage.
Tripods
Not all tripods are created equal, especially when it comes to video. If you want to pan or tilt while the camera is rolling, make sure you pick a tripod with a fluid head. That way you don't have snags that make your footage look strange.
If you're not into the idea of carrying around a gimbal or Glidecam, and you don't like the static visuals from a tripod, consider a shoulder rig. A shoulder rig gives you the flexibility to add more accessories to your camera (bigger lenses, audio devices, and even a monitor) and makes it easier to create moving shots with less fatigue.

-
Pay Attention to White Balance
If you shoot in auto white balance, you're not going to want to do that when filming. While editing photos in RAW makes white balance in camera almost irrelevant, it’s not the same case when it comes to video. You’ll have less control over that in post (especially if you’re not a very talented video editor) so you’ll want to do your best to fix white balance in camera whenever possible, which means taking ALL of the lights in a scene into account.
Yes, RAW is also available in video, but it’s a much larger file and much more difficult workflow. We’ll cover that at a later point. For the time being, you’ll want to skip RAW video until you’re ready to tackle more advanced topics.

-
Adjust Your Lighting Skills
If you feel like you've mastered lighting in photography, the good news is that most of that knowledge should transfer over to video. The angles and aesthetics haven't changed; it's just the lighting is continuous instead of momentary. However, there are a few things to keep in mind that are different between photo and video lighting. For instance:
-
If you’re adding your own light(s) to a scene, you have to pay more attention to and match the color temperature of any light that’s already there.
-
You’re probably going to need a lot more light than you think, so plan on getting the most you can afford. Sure, it’s possible to shoot in natural light, but it’s a lot more difficult to get things exactly how you want them to look.
-
Beware of fluorescent lights, as they “flicker” at most video capture rates. If you’re shooting in an office building with these kinds of lights, plan on bringing your own lighting and turning the fluorescent ones off.
We have a huge variety of lights, so call us for recommendations about lighting setups for nearly any situation. It varies greatly whether you’re shooting an interview, lighting a movie set, recording a wedding reception, or needing something that is run-and-gun ready. We’ve seen just about everything, and are happy to chat about the best options to fit your budget.
-
Get Some Neutral Density Filters
Since you can't exactly crank your shutter speed like you would when photographing an outdoor wedding ceremony, if you don't use a neutral density filter, you'll end up cranking up your aperture and losing that shallow depth of field. ND filters can save your film’s aesthetic by cutting highlights so you can film in bright sunny conditions. While you can get drop-in ND filters to use with a matte box, the easiest ones to use screw onto the front of your lenses. This makes them easy to switch out between different lighting scenarios. Try to avoid the variable versions of these filters, as they can give your footage a nasty color cast and cause strange artifacts in open skies. It’s much better to use a different strength for each situation as needed. Keep in mind that like any filter, they are sized to fit your lens, meaning you may need multiple sizes to fit on all of your glass. Always get the largest size you'll need, as these are able to be mounted on your smaller lenses via step-down rings. You can’t go the other way.

-
Freaky Fast Memory Cards
Not all memory cards are created equal. For video production, you'll want a memory card that can write at faster speeds, especially if you are shooting in 120fps or 240 fps! Check out a couple of these freaky quick cards that can support all of the slow-motion shots (be sure to pick the right format for your camera!):
Angelbird 256GB Pro UHS-II SD Card V90
SanDisk 512GB Extreme Pro CFExpress Card
-
Start Shooting in Log Profiles
As a professional, you would never shoot photos in jpeg; you're always in RAW. When filming it’s similar, you want to shoot in LOG (or its more technical term: logarithmic profile). Each camera brand has its version (S-log for Sony, C-log for Canon, N-Log for Nikon), but basically, it's a format that is recording a very high dynamic range and color gamut. While unedited, it looks dull, flat, and almost muddy. However, it has the most detail preserved and allows you to manipulate video footage to its maximum potential in your editing program. There are other profiles that you can record in, but Log is the industry standard. Play with the different profiles and see which works best with your editing skills when first starting. Once you have that set, you’ll need to master the next step…

-
Learn Color Grading
Even if you've mastered your style in Lightroom, you're guaranteed to struggle the first few times you try color-grading your video footage. Photographers have presets for both Photoshop and Lightroom, but what videographers have is called a LUT (Look Up Table). While not exactly the same, they function in a similar way, by applying a global change to things like contrast, saturation, brightness, and other color variables. Just like presets, you can purchase these if you want a quick start, or put in the effort to create your own and have your signature style that can easily be applied to future projects.

-
Get Your Hands On The Best Cameras
When you're first starting with video, don't get too caught up in "which camera is best." However, you'll most likely want a professional-grade camera that does film in at least 60 fps at your desired resolution. Here are cameras that will help you start your filmmaking journey:
The Canon EOS R5 is the pro body in the new mirrorless line. This camera has an amazing autofocus system with 1053 focal points that is speedy fast! This beast of a camera films up to 120FPS in 4k, meaning silky smooth high definition slow-motion shots. Rent the R5 now.
Panasonic Lumix DC-S1H Mirrorless
Need 6k? Perfect! The panasonic cameras are known for impressive gamma settings and V-log, with 14 stops of dynamic range. This bad boy films 60fps in 4k, and 120fps in 1080p.Check out the rest of the specs on the DC-S1H here.
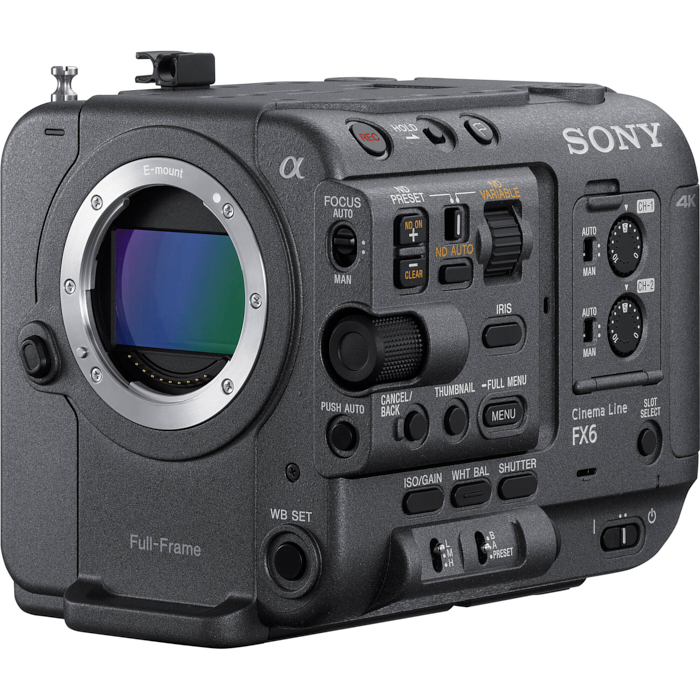
The A7sIII is the latest and greatest video camera to be released by Sony in November of 2020. Film in 120 FPS at 4K with no recording limits (you’ll need a great SD card though), with 15-stops of dynamic range in S-Log2 or S-Log3 creating dreamy cinematic content. Get your hands on the A7sIII here.
Black Magic Pocket Cinema Camera 6K
Want a super high quality camera with incredible color and 6k footage, yet small in size? Take a look at the Black Magic Pocket Cinema Camera 6k. Make some magic with the camera here.

-
Start Telling a Story
If you want to earn the title "cinematographer" or "filmmaker," make sure you're not only creating stunning footage but telling a compelling story. Stories generally have a beginning, middle, and end, so your films should too! If you don't storyboard or brainstorm your photoshoots, you should start doing so for your video projects, making you much more than just a"videographer."
-
Learn the Lingo: A-Roll vs. B-Roll
Once you dive into the video scene, you may hear people referring to A-Roll and B-Roll. A-Roll is the primary shots of your subjects talking (think of a person being interviewed), B-Roll is usually extra footage that is often your more slow-motion shots that may or may not have a voice-over. If you can think of a wedding highlight film, that is most likely primarily B-roll footage.
*** Extra videographer tip: Film any A-Roll in 23.976 FPS. You can choose between 23.976fps, 60fps, and 120fps for B-roll depending on your goal and aesthetic.
-
Find Your Editing Software
If you already own the Adobe creative cloud chances are you have access to both Adobe Premiere and Adobe Premiere Rush (the dumbed-down version). If you don't own Premiere, take a look at the free open source software Da Vinci (we love free software around here). Some say that Da Vinci offers the best color-grading options. Final Cut and Avid Media Composer are two other professional-level software editing platforms.
-
Upgrade Your Computer
So your computer can support Lightroom and Photoshop, but do you have enough power to edit 4k+ video? There are many costs to adding video to your business, and a computer upgrade may be one of them. Make sure your computer has a dedicated video card, at least 16gb of RAM, an i7 or i9 quad-core processor, and of course, plenty of storage.
If storage is an issue, look at RAID Storage systems and always try to stick with solid-state drives and at least a USB 3 connection. While mechanical drives are cheaper, they can slow down your workflow.
Switching from Photography to Videography
While your first few videos most likely won't be perfect, we hope that this advice still saves you from pulling out your hair and learning the hard way. Our best bit of videographer advice is to not practice on a client's project; practice on your own first. Give yourself some time to remember frame rates, change your picture profile, and hopefully hit record on your audio recording device (it's all too easy to forget). Most importantly, be patient with yourself because your video skills will improve over time! If you have any questions or video tips please add them in the comments section.