


If you’ve ever watched a photography behind-the-scenes video you’ve likely seen the complexity of lighting a portrait. There’s a lot to consider when photographing people: separation from background, visibility, texture, shadow, catch lights, distortion, definition, etc. Depending on the photographer you could see 6 lights being used simultaneously. The simple truth is that there is more to light than using as much as possible. Whether you’re new to lighting or an experienced portrait photographer, being able to effectively use a single light is a valuable skill.
One of the first things anyone teaching how to light will demonstrate is what a single light does to a subject. Simply moving the light around the subject will completely change how the subject is viewed. One angle may highlight a specific feature, while another angle may hide that feature entirely. Similarly, just changing the distance of the light source to the subject will have a dramatic effect on the subject’s appearance.
Here are some things to consider when using a single light source to illuminate your subject:
Shadow
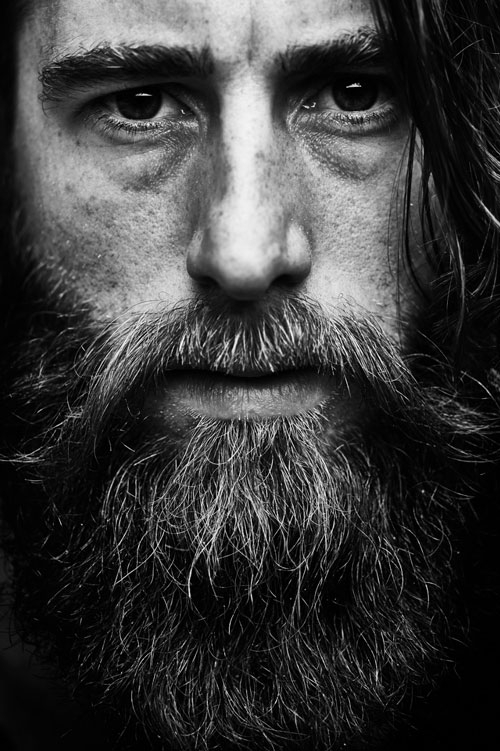
Yeah, it seems like a “duh” point but stay with me. Using a single light source means that you have a lot of shadow to play with. This shadow could be lessened by using a reflector, left as is, or accentuated further by using negative fill (more on this later). Shadow can increase clarity and accentuate texture as well as give shapes more appearance of volume. Shadow is a powerful tool that is just as important as light when photographing a subject, and using a single light source potentially gives you a lot of shadow to play with.
Position
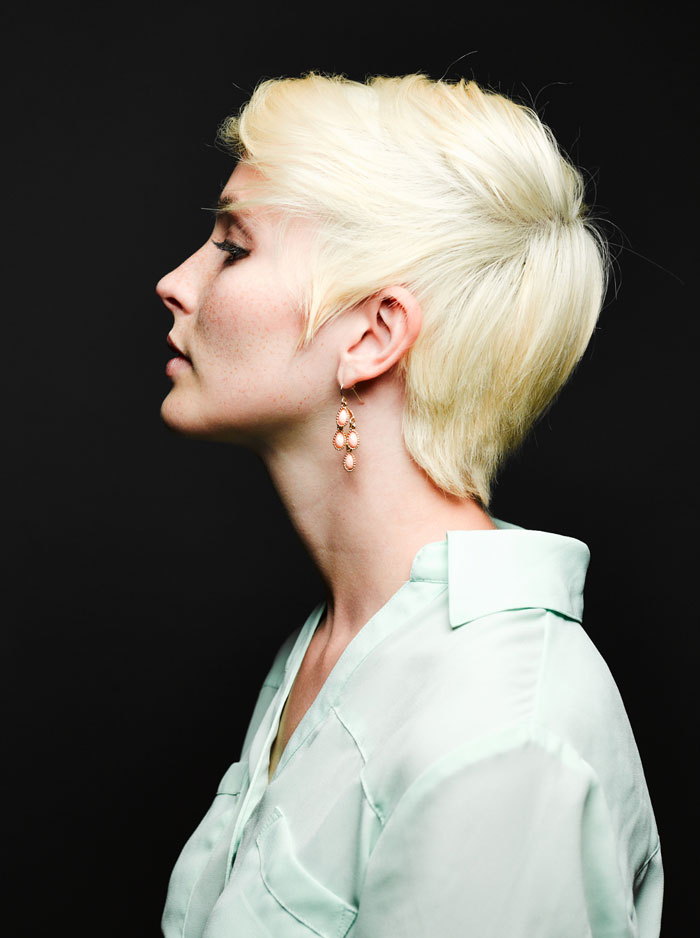
Perhaps the most important aspect of using a single light is where it is positioned. It sounds obvious, but the difference between a few degrees could have a dramatic difference on your subject. Positioning a light directly in front of and above a subject will essentially remove all shadows on the face . Moving the light 45º creates a shadow and is known as Rembrandt lighting thanks to the characteristic triangle of light underneath the eye on side of the face opposite the light and is often quite pleasing.
Distance
The distance of the light to the subject also plays a significant role in how the subject is rendered. The closer the light source is to the subject the larger, and therefore softer, the light will be. Soft light is best described by its graduated, feathered transition into shadow and its less intense non-specular highlights. On the other hand, increasing the distance between the subject and the light source will result in a smaller light source relative to the subject and in turn will produce a harder light, best described by its much harsher and faster transition between light and shadow. Typically, soft light is desired for portraiture and tends to be quite flattering, however hard light (when positioned properly) has an excellent effect of filling in wrinkles and covering up imperfections.

On-Light Modifiers
Also extremely important to consider is the ability to modify the light source by directly softening or focusing the light. A large soft box, umbrella, or octobox renders a soft, painterly quality of light. Similar to reducing the distance between the light source and subject, a large light modifier will produce a large amount of spill and wrap around the subject to a great extent. This is contrary to the hard light of a beauty dish or ring light which offers a much more intense rendering and drastically sharper transition into shadow.

Indirect Modifiers
Light from a single source can further be modified by indirect modifiers like reflectors, cookies, and negative fill. Even though light is coming from a single source its spill, or light not directly hitting the subject, can be manipulated and redirected. In a typical portrait shoot a white reflector is often placed directly below the subject’s face, or when positioned 45º to the subject, directly opposite the light so that the shadows describing the bottom of the face are lightened or potentially removed entirely.
If drama is what you seek, then negative fill can accentuate shadows even further and make them darker. This is accomplished by placing a “flag” which is essentially a black piece of cloth over a frame next to the shadow you’re looking to accentuate. This makes the shadow more intense since it is preventing any stray light from filling the shadow.

As with learning any new skill, practice makes perfect. By mastering a single light portrait you can then start adding lights for specific effect, like fill, rim, or a hair light. Still, the best place to start is with a single light source, experimenting with the quality of light that provides, and then adding from there.
To start learning how to light, consider renting a portable kit like our B1x kit. This kit from Profoto offers flexibility in that the lights are powerful, yet are cordless so they can be easily positioned without having to worry about cables. This also allows them to be used essentially everywhere.
You'll also want to experiment with light modifiers, like the Profoto 3' RFI Octobox which provides a nice balance between a circular light source for a natural looking circular catch light and softbox for great wrapping. For a large liht source that nicely balance hard and soft light, consider a large umbrella like our 72" Impact Parabolic Umbrella. Lastly, consider a hard light source like our white Profoto Beauty Dish or for very directional light, the grid kit for our Profoto Zoom Reflector.
Experimenting with hard and soft light sources in a single light setup is an excellent learning tool. Take advantage, and use your newfound skills on your next shoot!